Step By Step
Installing Shaka for Slack
Installing Shaka to Slack is easy and fun! It will take you about 10 minutes to get Shaka up and running for your workspace! Follow our step-by-step instructions below or following along in this video tutorial.
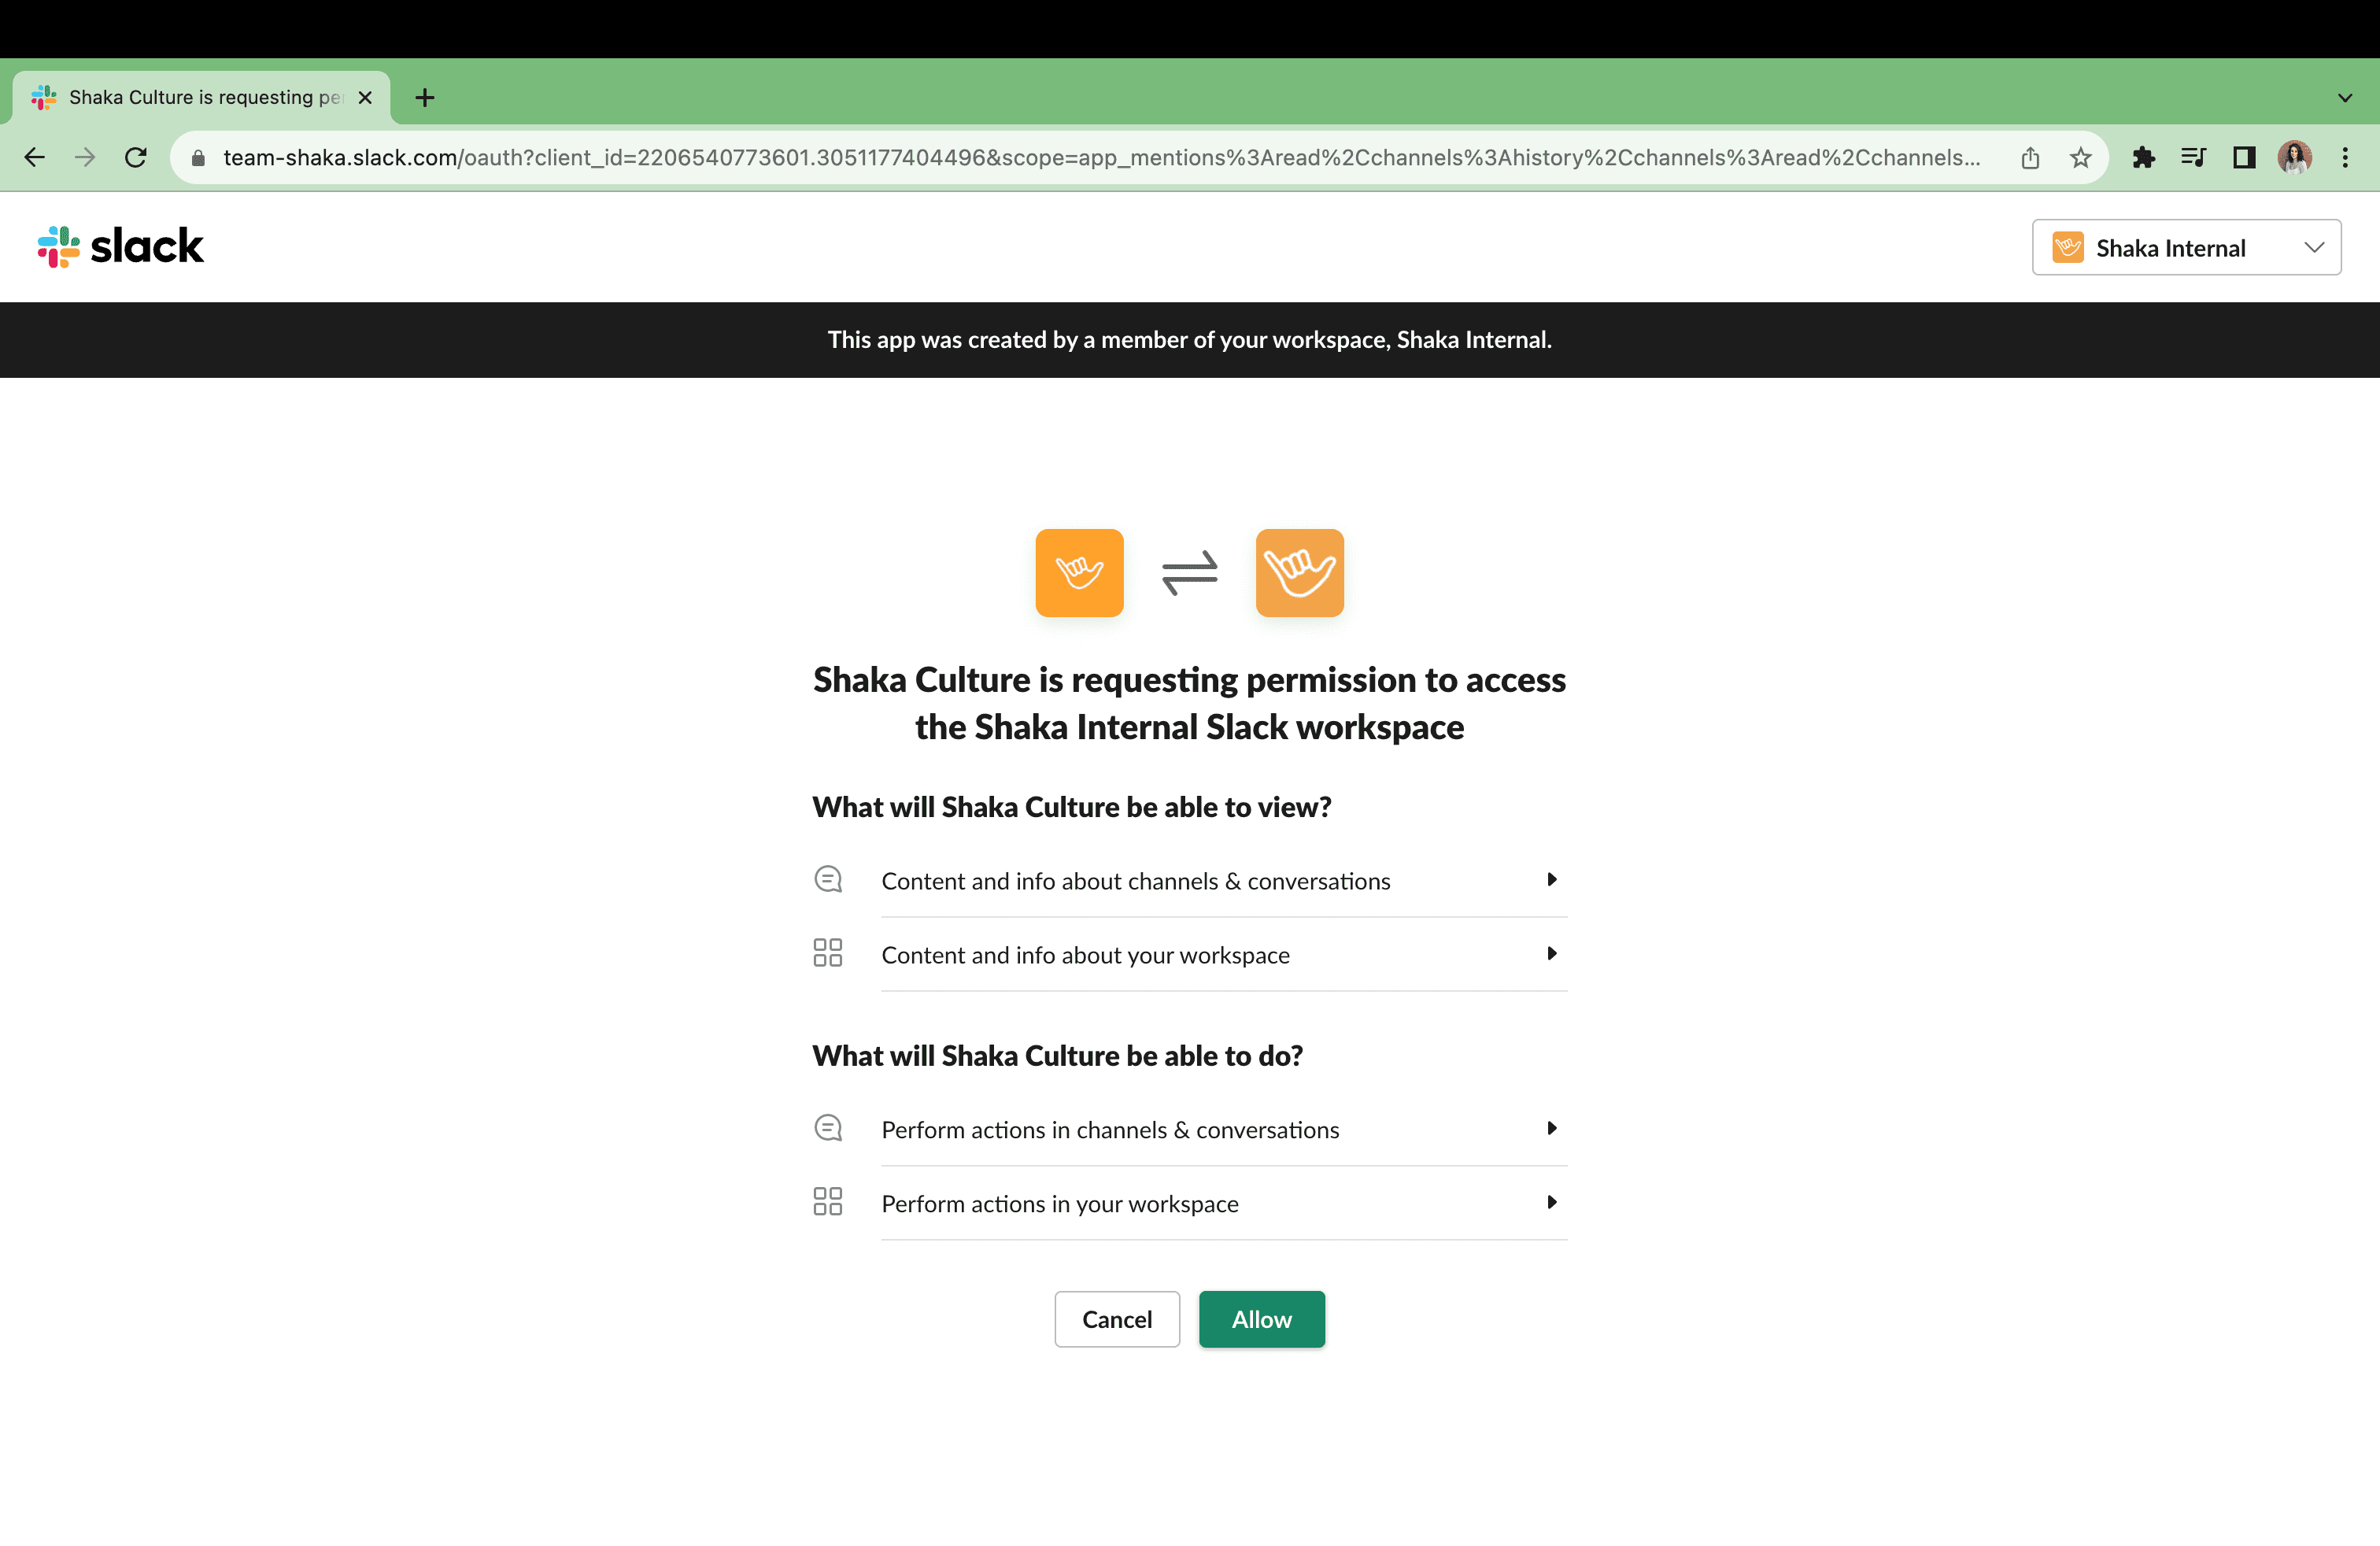
1. Add to Slack
Click the Add to Slack button below, this will open a new window where you should review and accept the require permissions to use Shaka within Slack.
2. Find Your New Conversation With The Shaka App
Open Slack and navigate to your conversation with the new Shaka App. You will notice that the Shaka App sent you a form to kick off your Shaka Set Up. At the very top of your conversation with the Shaka App, you can assign someone else to set up Shaka, but if you would like to oversee the application settings, continue with the active features form.

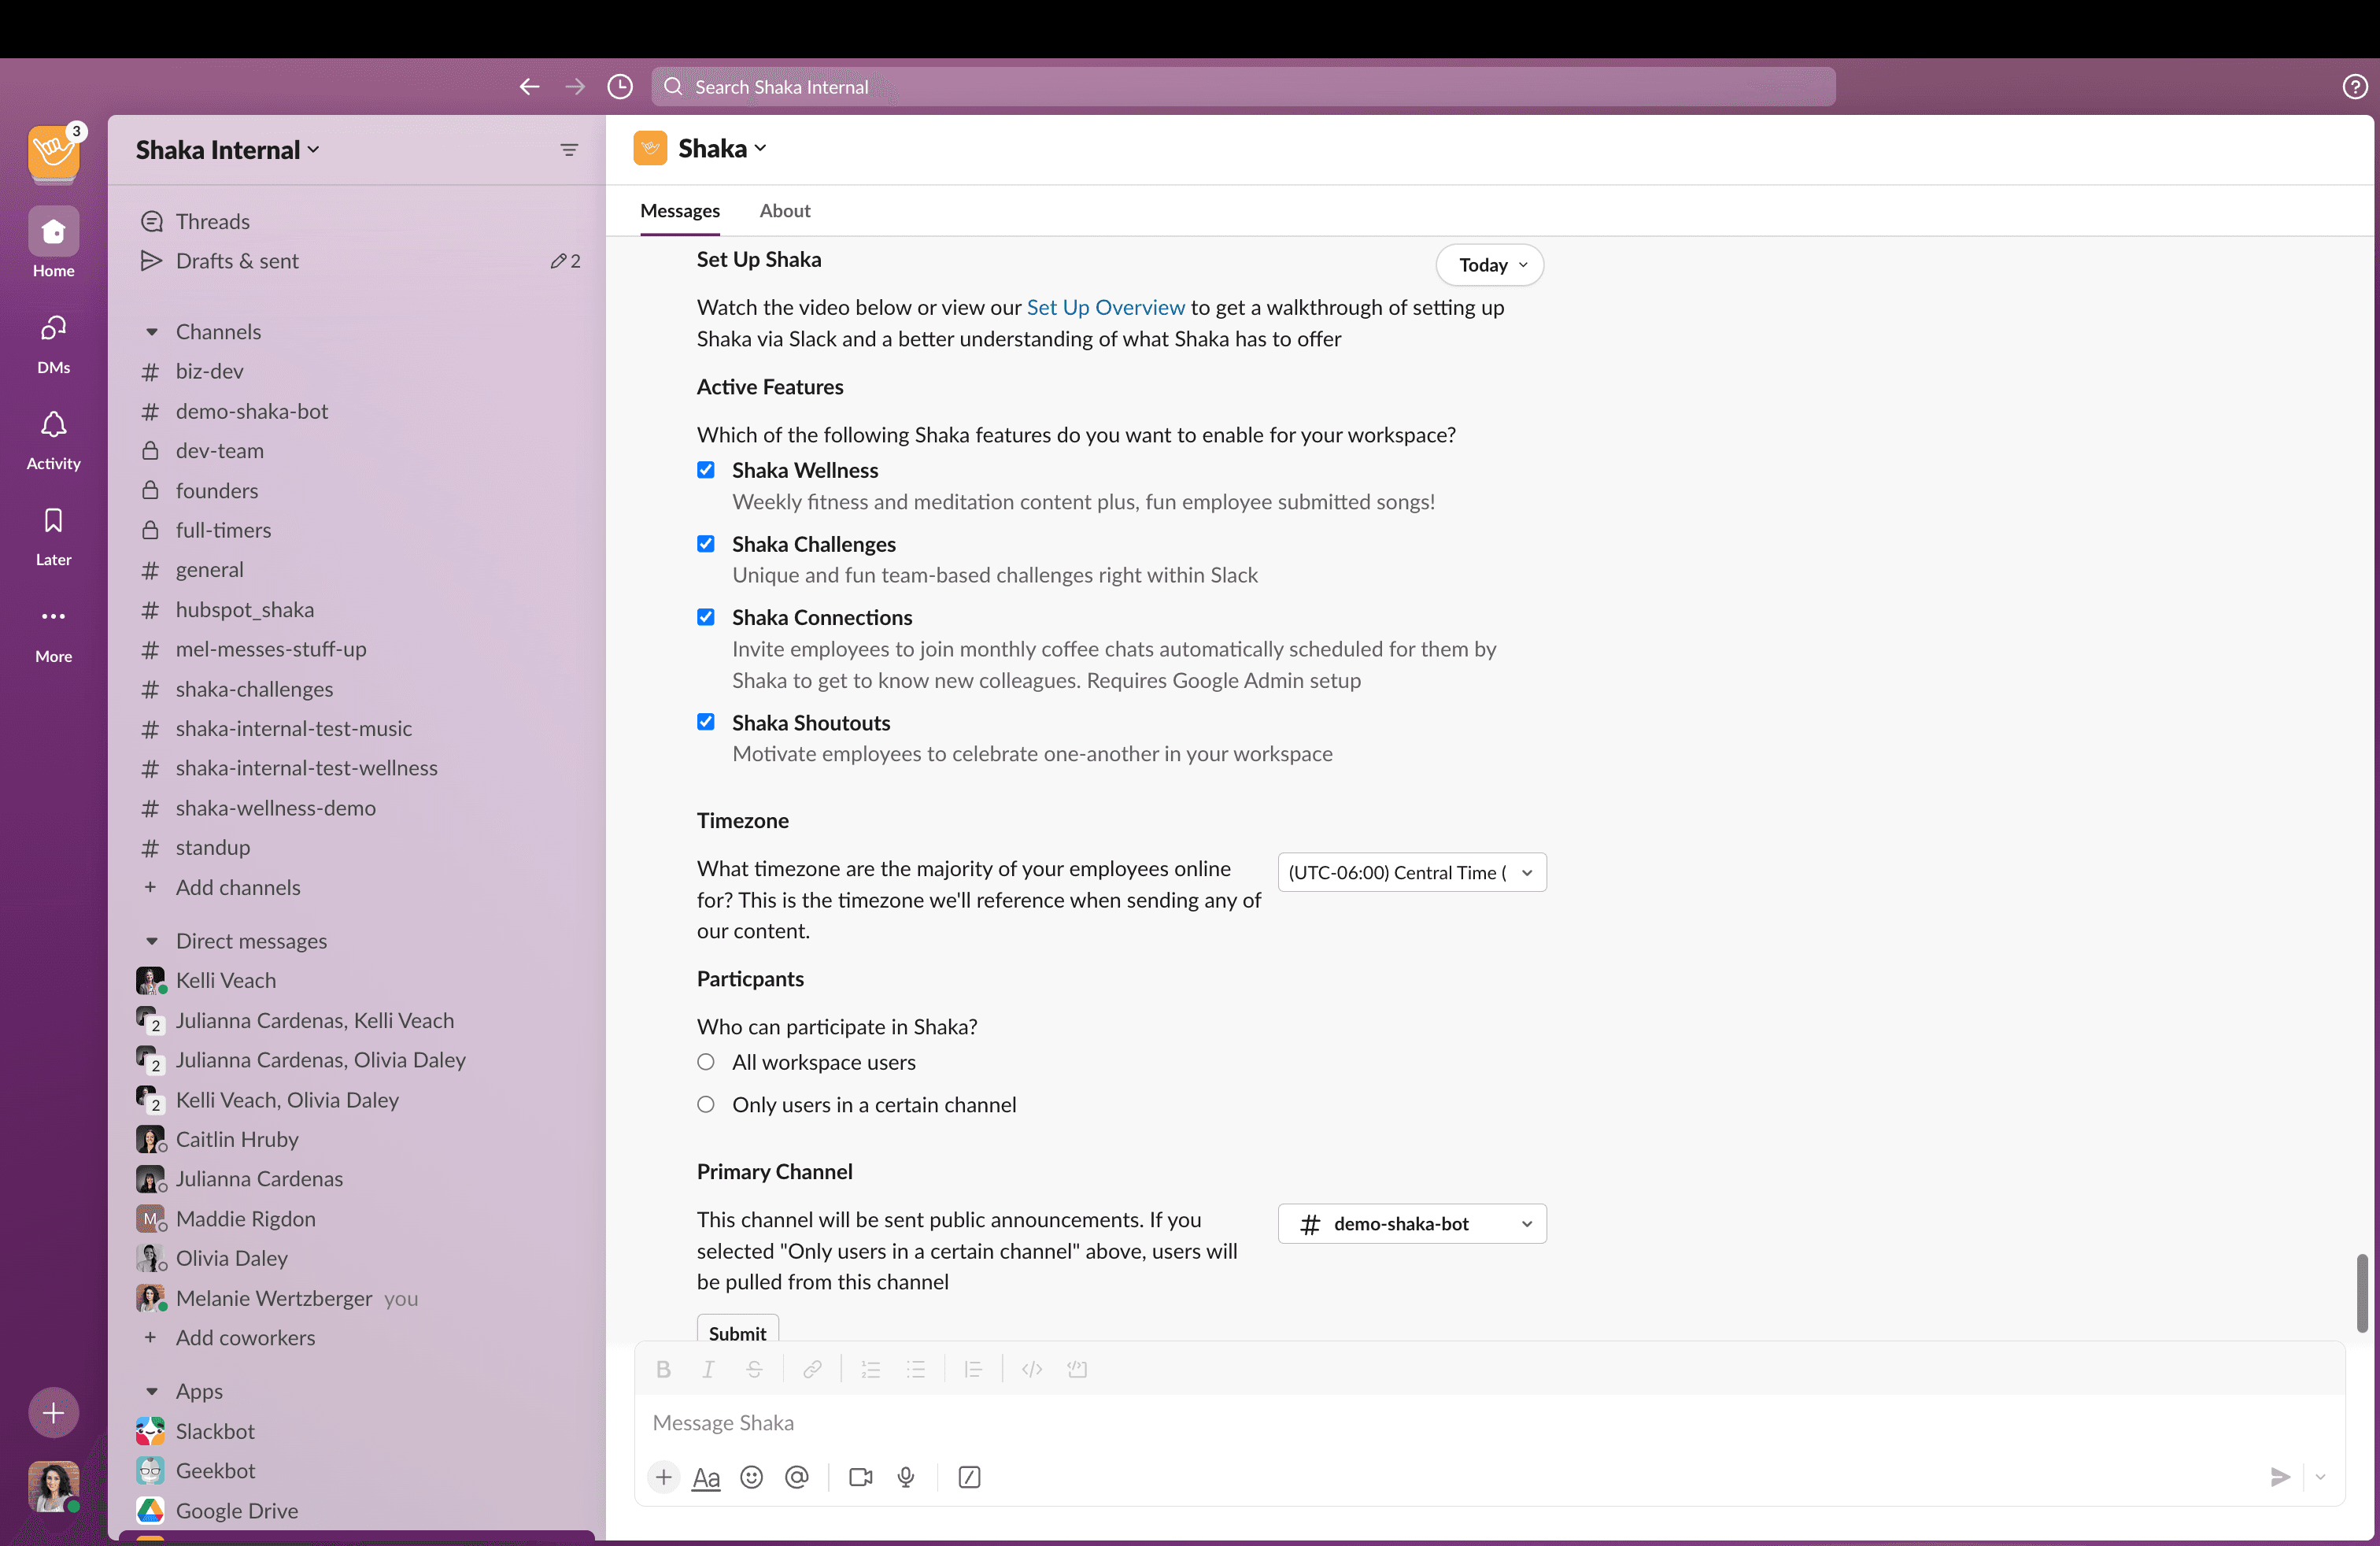
3. Complete the Active Features Form
Please note as you fill out these forms that you can always edit your settings later in the Shaka Admin Panel, however, you shuld set up as many features as possible in your initial set up.
- Active Features Enable as many features as you would like your team to utilize. You must select atleast 1 feature, we recommend selecting all of them!
- Timezone choose a timezone that represents when the majority of your employees are online, Shaka will typically send messages between 10 AM - 3 PM in this timezone.
- Participants Choose whether you want Shaka to set up user accounts for all of the users in your Slack workspace or only the users in a specific channel. For example, if your entire company can use Shaka, select all workspace users but if you are setting up Shaka for just a department, team or regional office, then select only users in the primary channel (you will select the primary channel in the next step).
- Primary Channel This is the channel where Shaka will send very high-level general announcements if needed. These announcements will be rare as you will be able to select a different channel for communications for each feature if you would like. This channel is also where Shaka will pull your users from if you selected only users in a certain channel in the previous question.
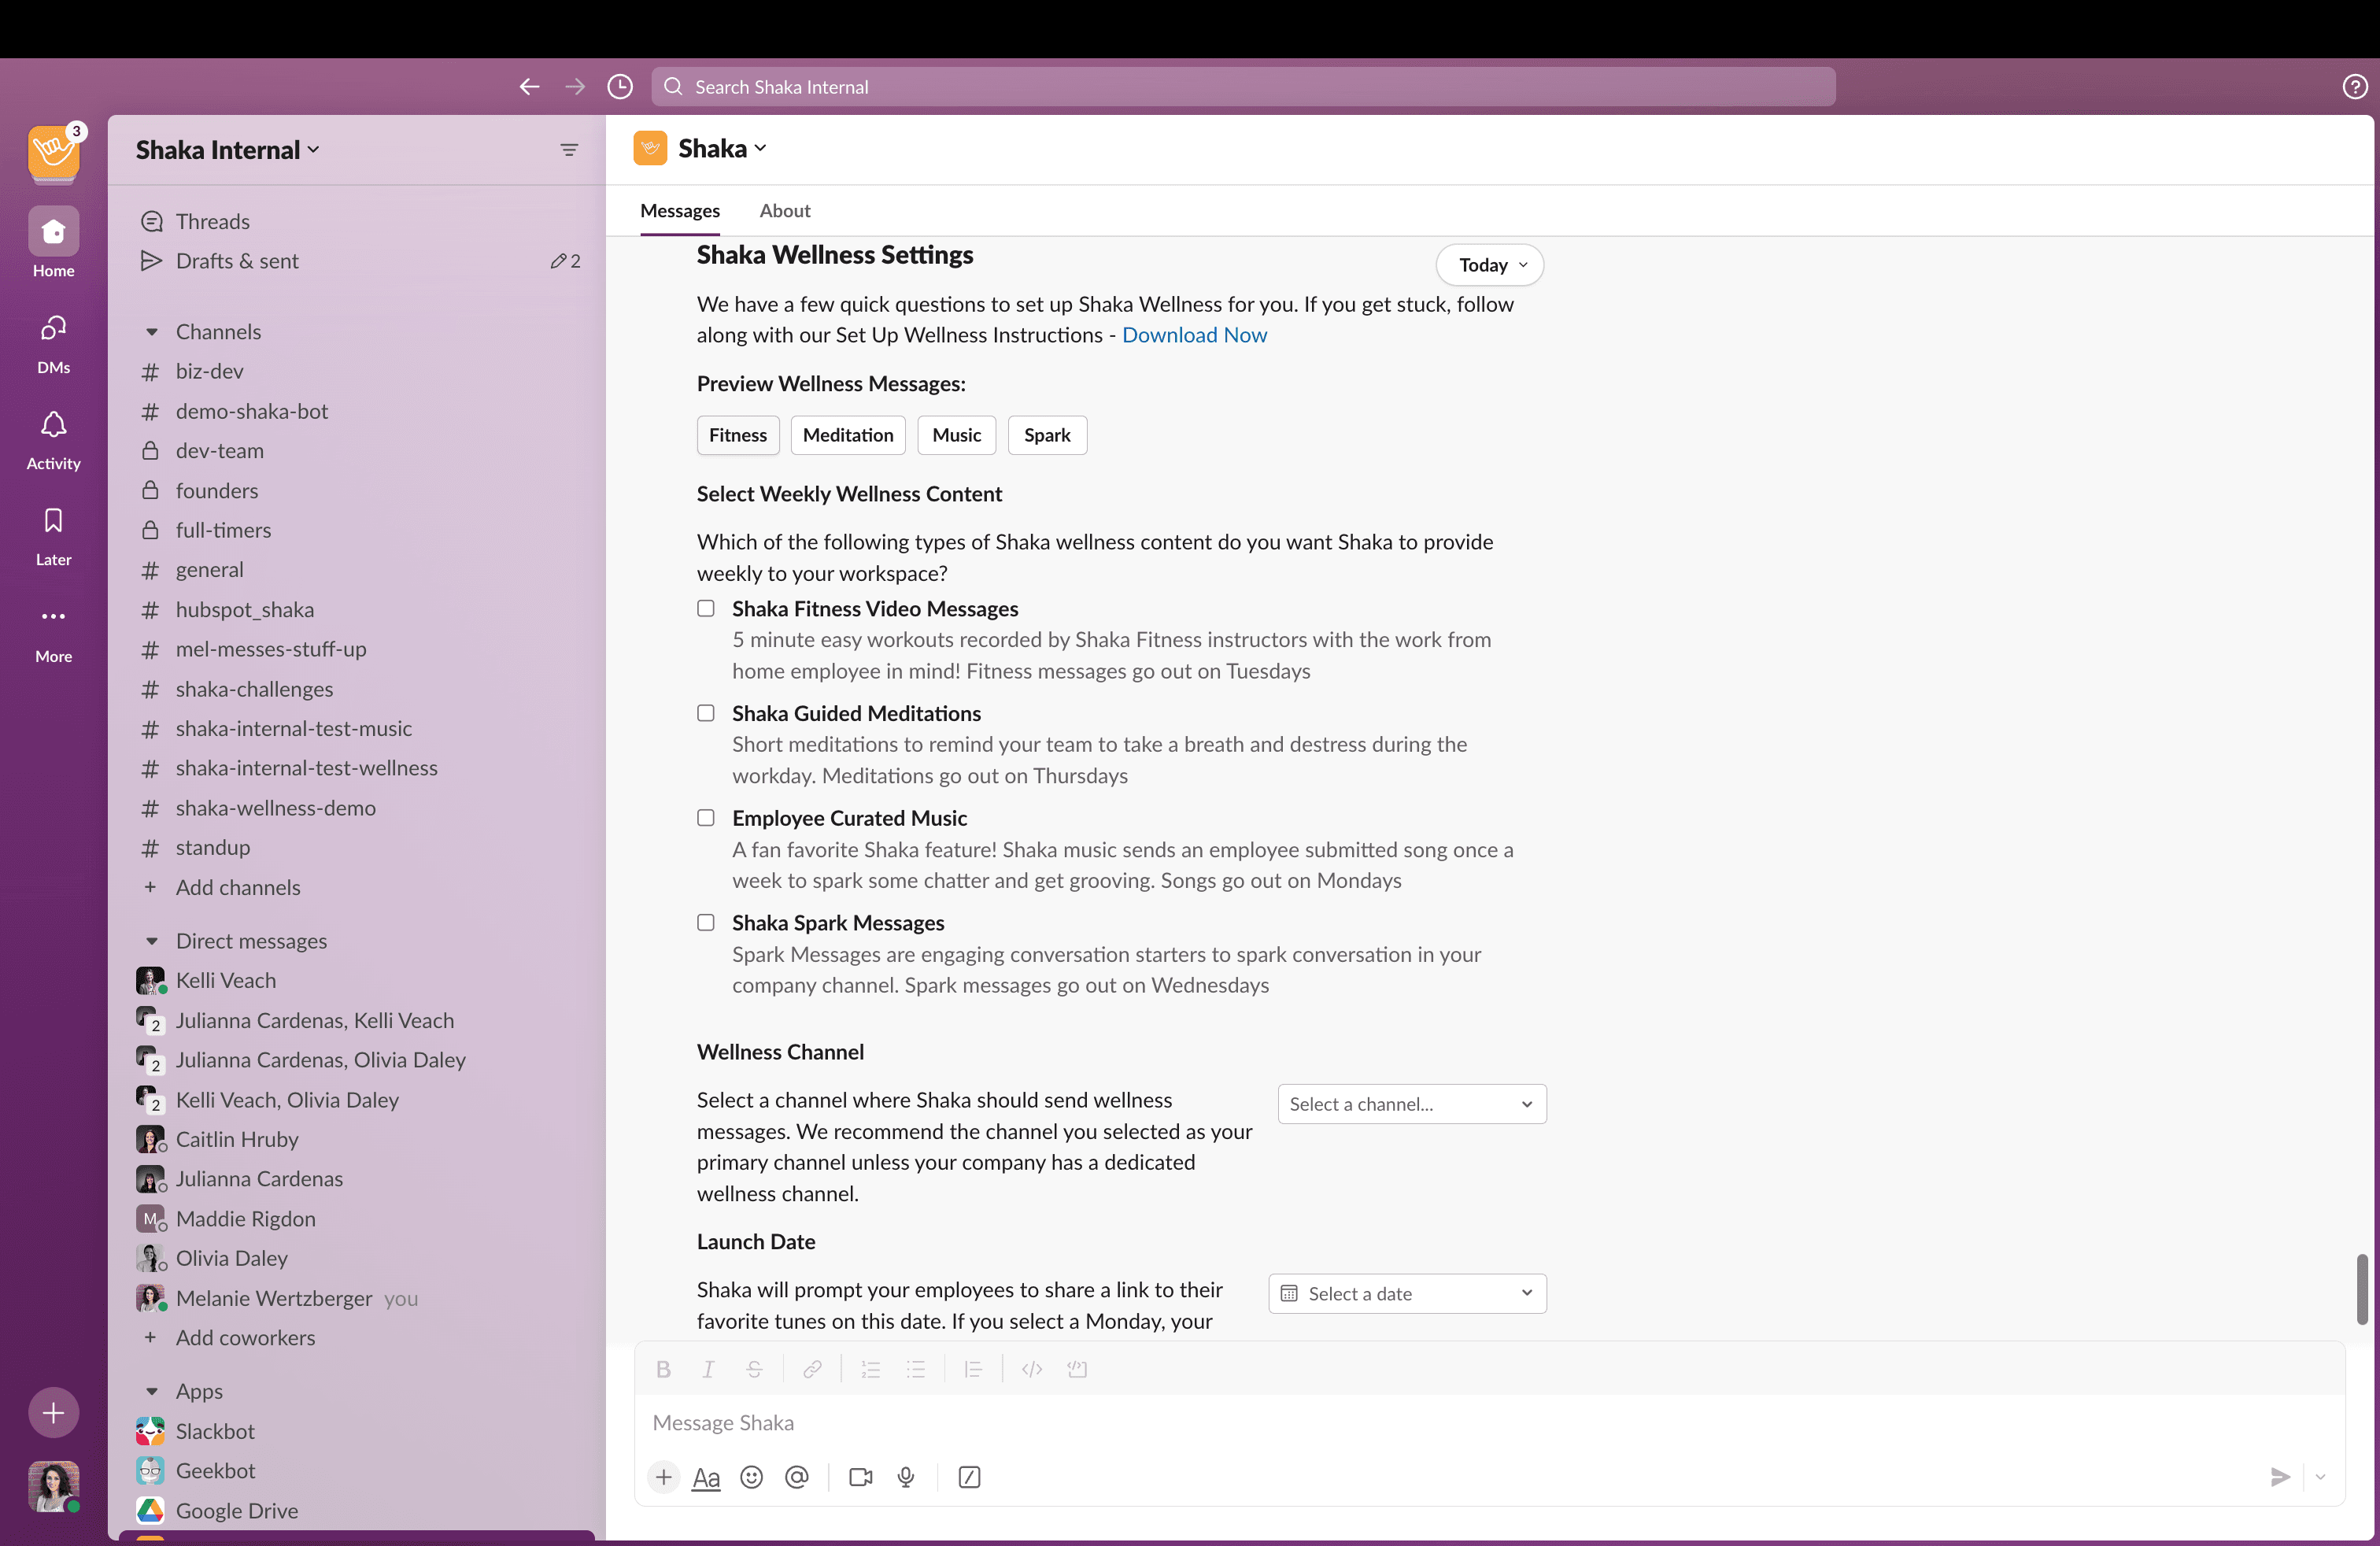
4. Complete the Wellness Settings Form
You will only see the Wellness Settings Form if you selected Wellness as one of your active features. If you did not select Wellness, please move forward to step 5.
- Select Weekly Wellness Content You can choose which of Shaka's Wellness content you would like to share with your team. Since each type will only be delievered once per week, it is not overwhelming to select them all and we highly recommend that you do! At the top of the Wellness Settings Form, you can preview any of the types of Wellness Messages.
- Wellness Channel Do you have a specific channel within Slack dedicated to culture or wellness where you would like Shaka Wellness content to be delivered? If not, we recommend you select your primary channel from the previous step.
- Launch Date You may not want to launch all of Shaka's tools all at once, so Shaka allows you to pick a launch date for each of our features. You can pick any date in the future. On this day, Wellness messages will start to be delievered and the Shaka bot will ask your users to submit songs for Shaka Music if you have enabled that feature.
5. Complete the Connections Settings Form
You will only see the Connections Settings Form if you selected Connections as one of your active features. If you did not select Connections, please move forward to step 6.
- Connections Group Size Shaka can create different size groups for Connection meetings. How many people on average would you like to be matched per group by Shaka for Connections? If you have a lot of outgoing people on your team, we recommend groups of 2. If you have a lot of introverts, consider choosing groups of 4.
- Invite Employees to Join You may not want to launch all of Shaka's tools all at once, so Shaka allows you to pick a launch date for each of our features. This is the day Shaka will announce the new Connections program and invite users to join. They will recieve their first Connections meeting invite about 1 week after joining the program.
- Departments Shaka's matching algorithm wants to match employees who typically do not work together. For this reason, when an employee joins the Connections program Shaka will ask them to select their department from a list. You are building that list of departments here. These do not have to be your official company department names, simply build a list that groups your employees and be sure to separate them by semicolons. For example, Marketing; Sales; Engineering; Product; Customer Success;
- Office Locations Shaka's matching algorithm wants to match employees who typically do not work together. For this reason, when an employee joins the Connections program Shaka will ask them to select their office location from a list. You are building that list of locations here. These do not have to be your official company office loations, simply build a list that groups your employees and be sure to separate them by semicolons. For example, US - East; US - Central; US - West; Canada;

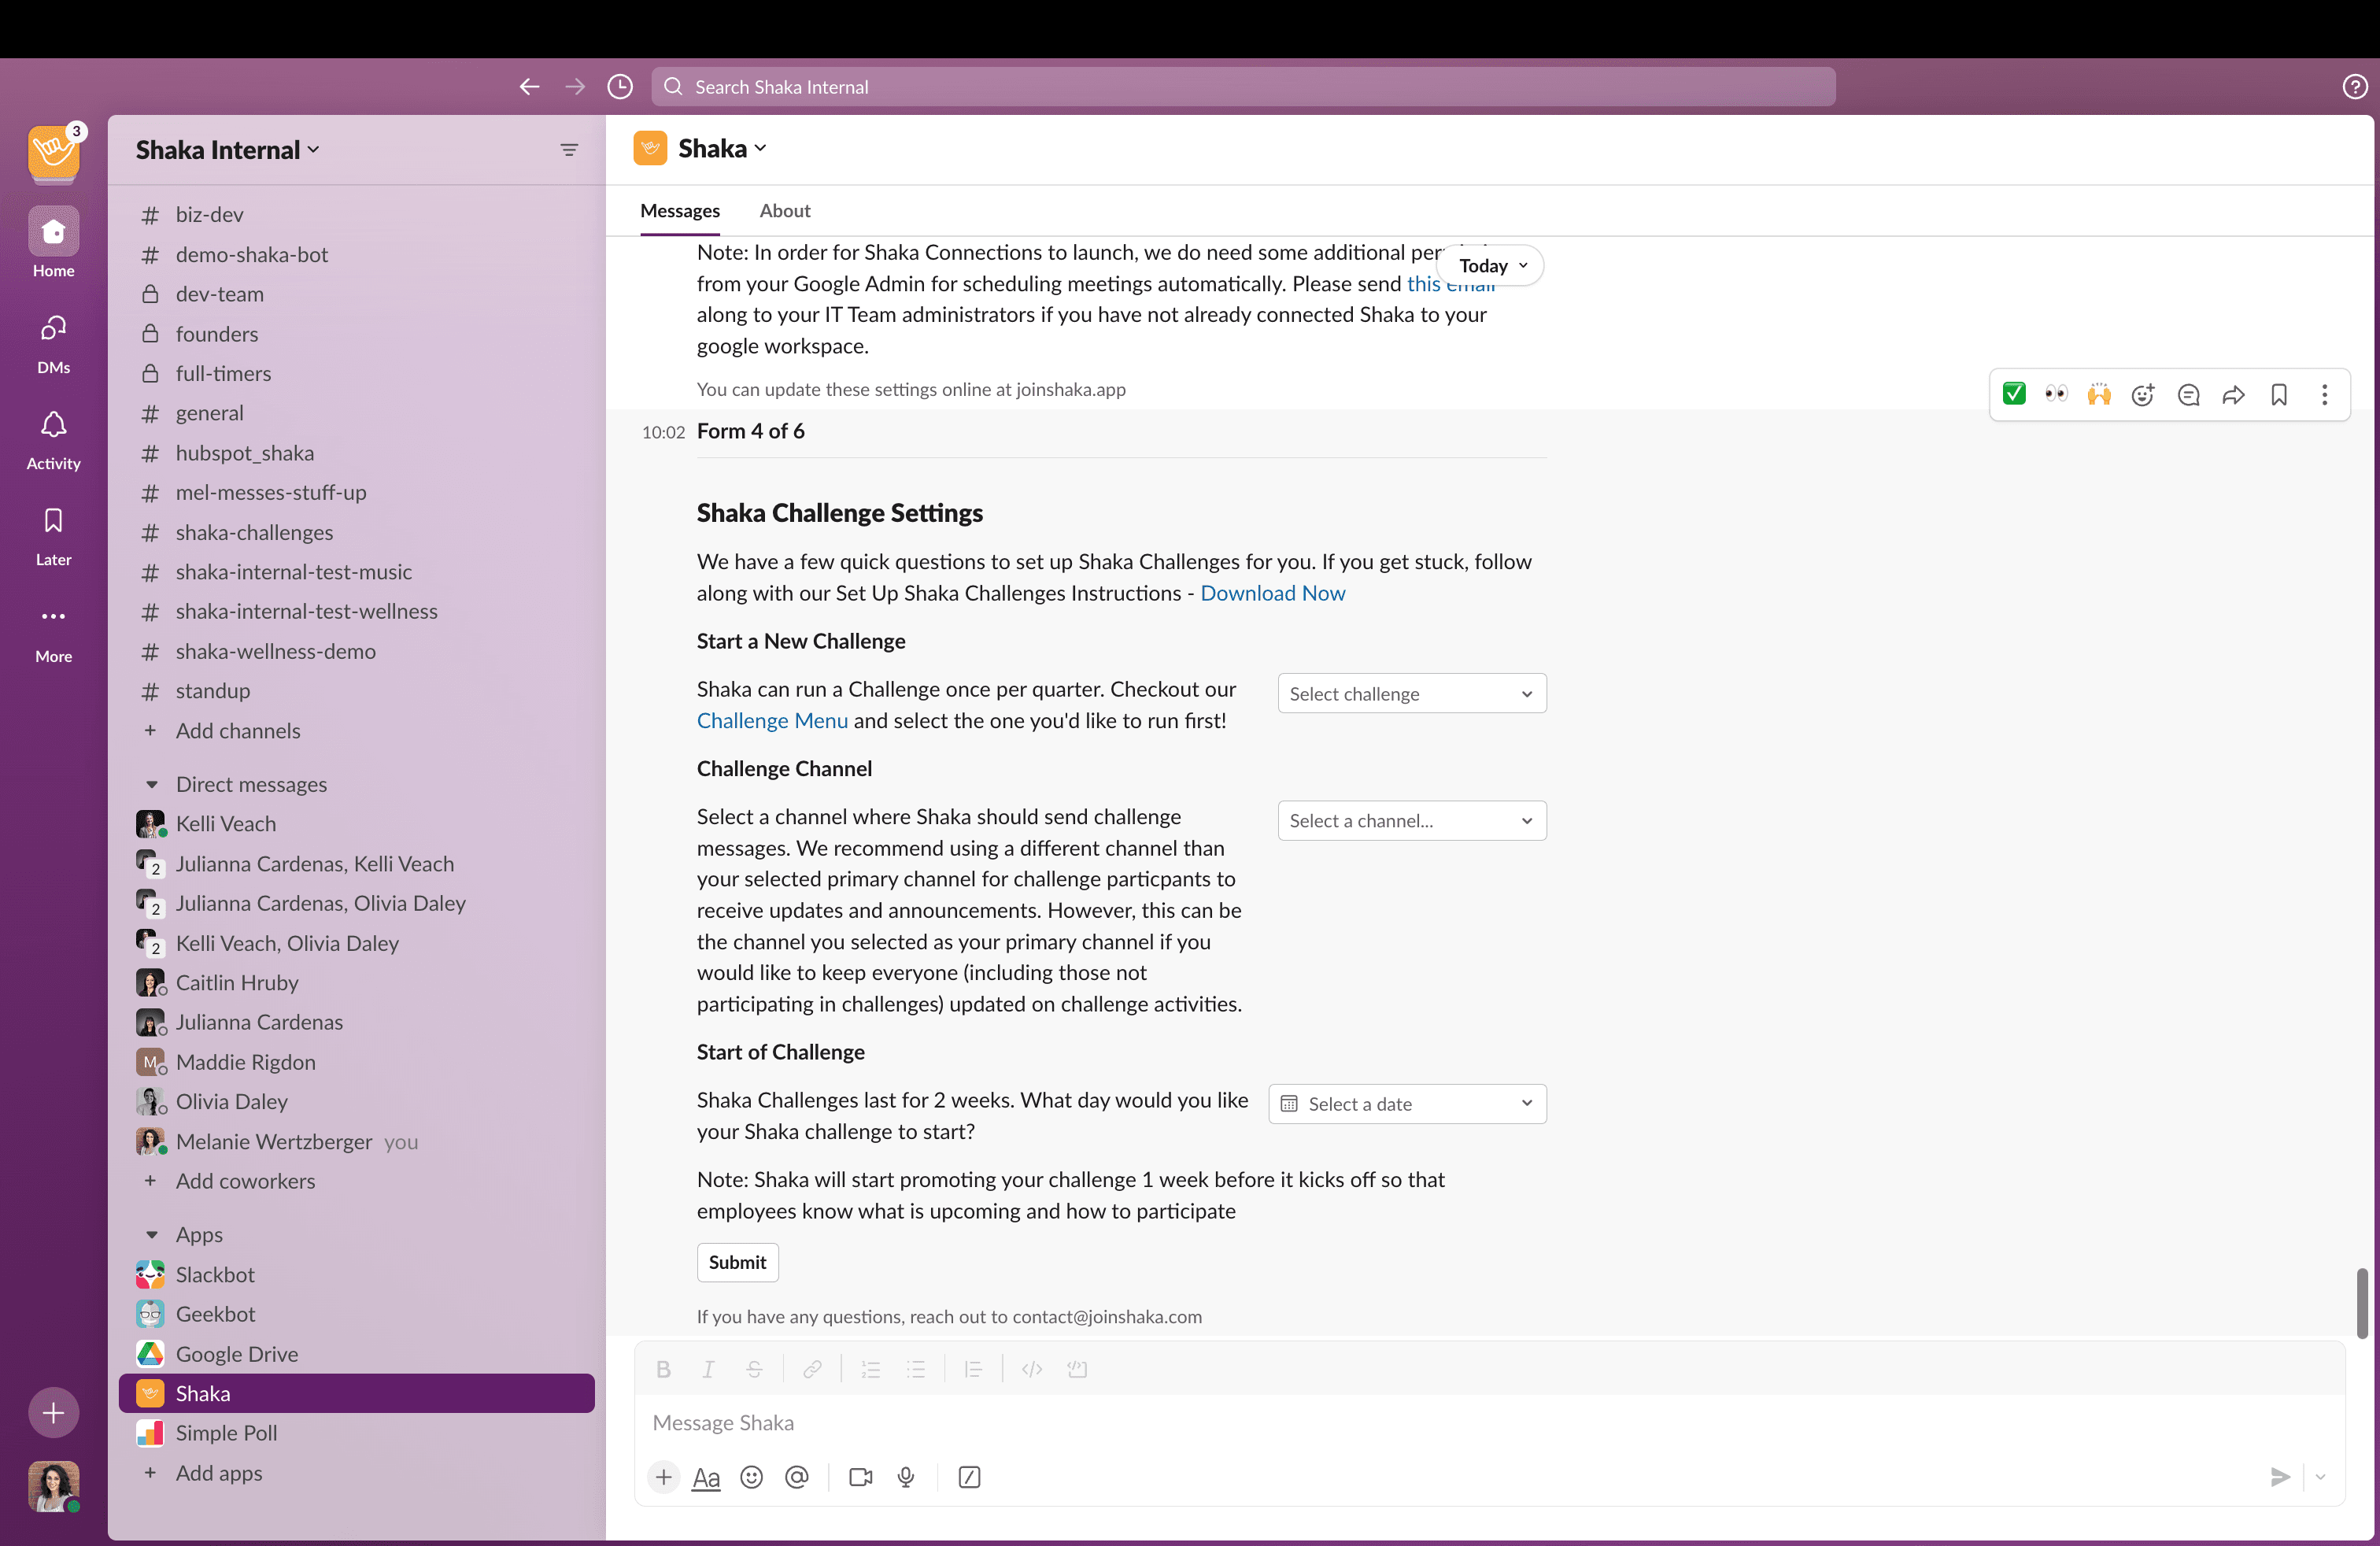
6. Complete the Challenges Settings Form
You will only see the Challenges Settings Form if you selected Challenges as one of your active features. If you did not select Challenges, please move forward to step 7.
- Select a New Challenge Review the attached Challenge Menu and pick a challenge you would like to run with your team in the near future. All challenges last 2 weeks.
- Challenge Channel Select a channel where employee challenge submissions can be celebrated and leaderboard updates can be sent throughout the challenge. Occassionally, people choose to create a new channel for this purpose but you can also simply select your primary channel if you would like updates to be sent to all of your users.
- Start of Challenge You may not want to launch all of Shaka's tools all at once, so Shaka allows you to pick a launch date for each of our features. You must select a challenge start date atleast 1 week into the future to give the Shaka App time to announce the challenge and invite participants to join. Your challenge will conclude 2 weeks after the selected start date.
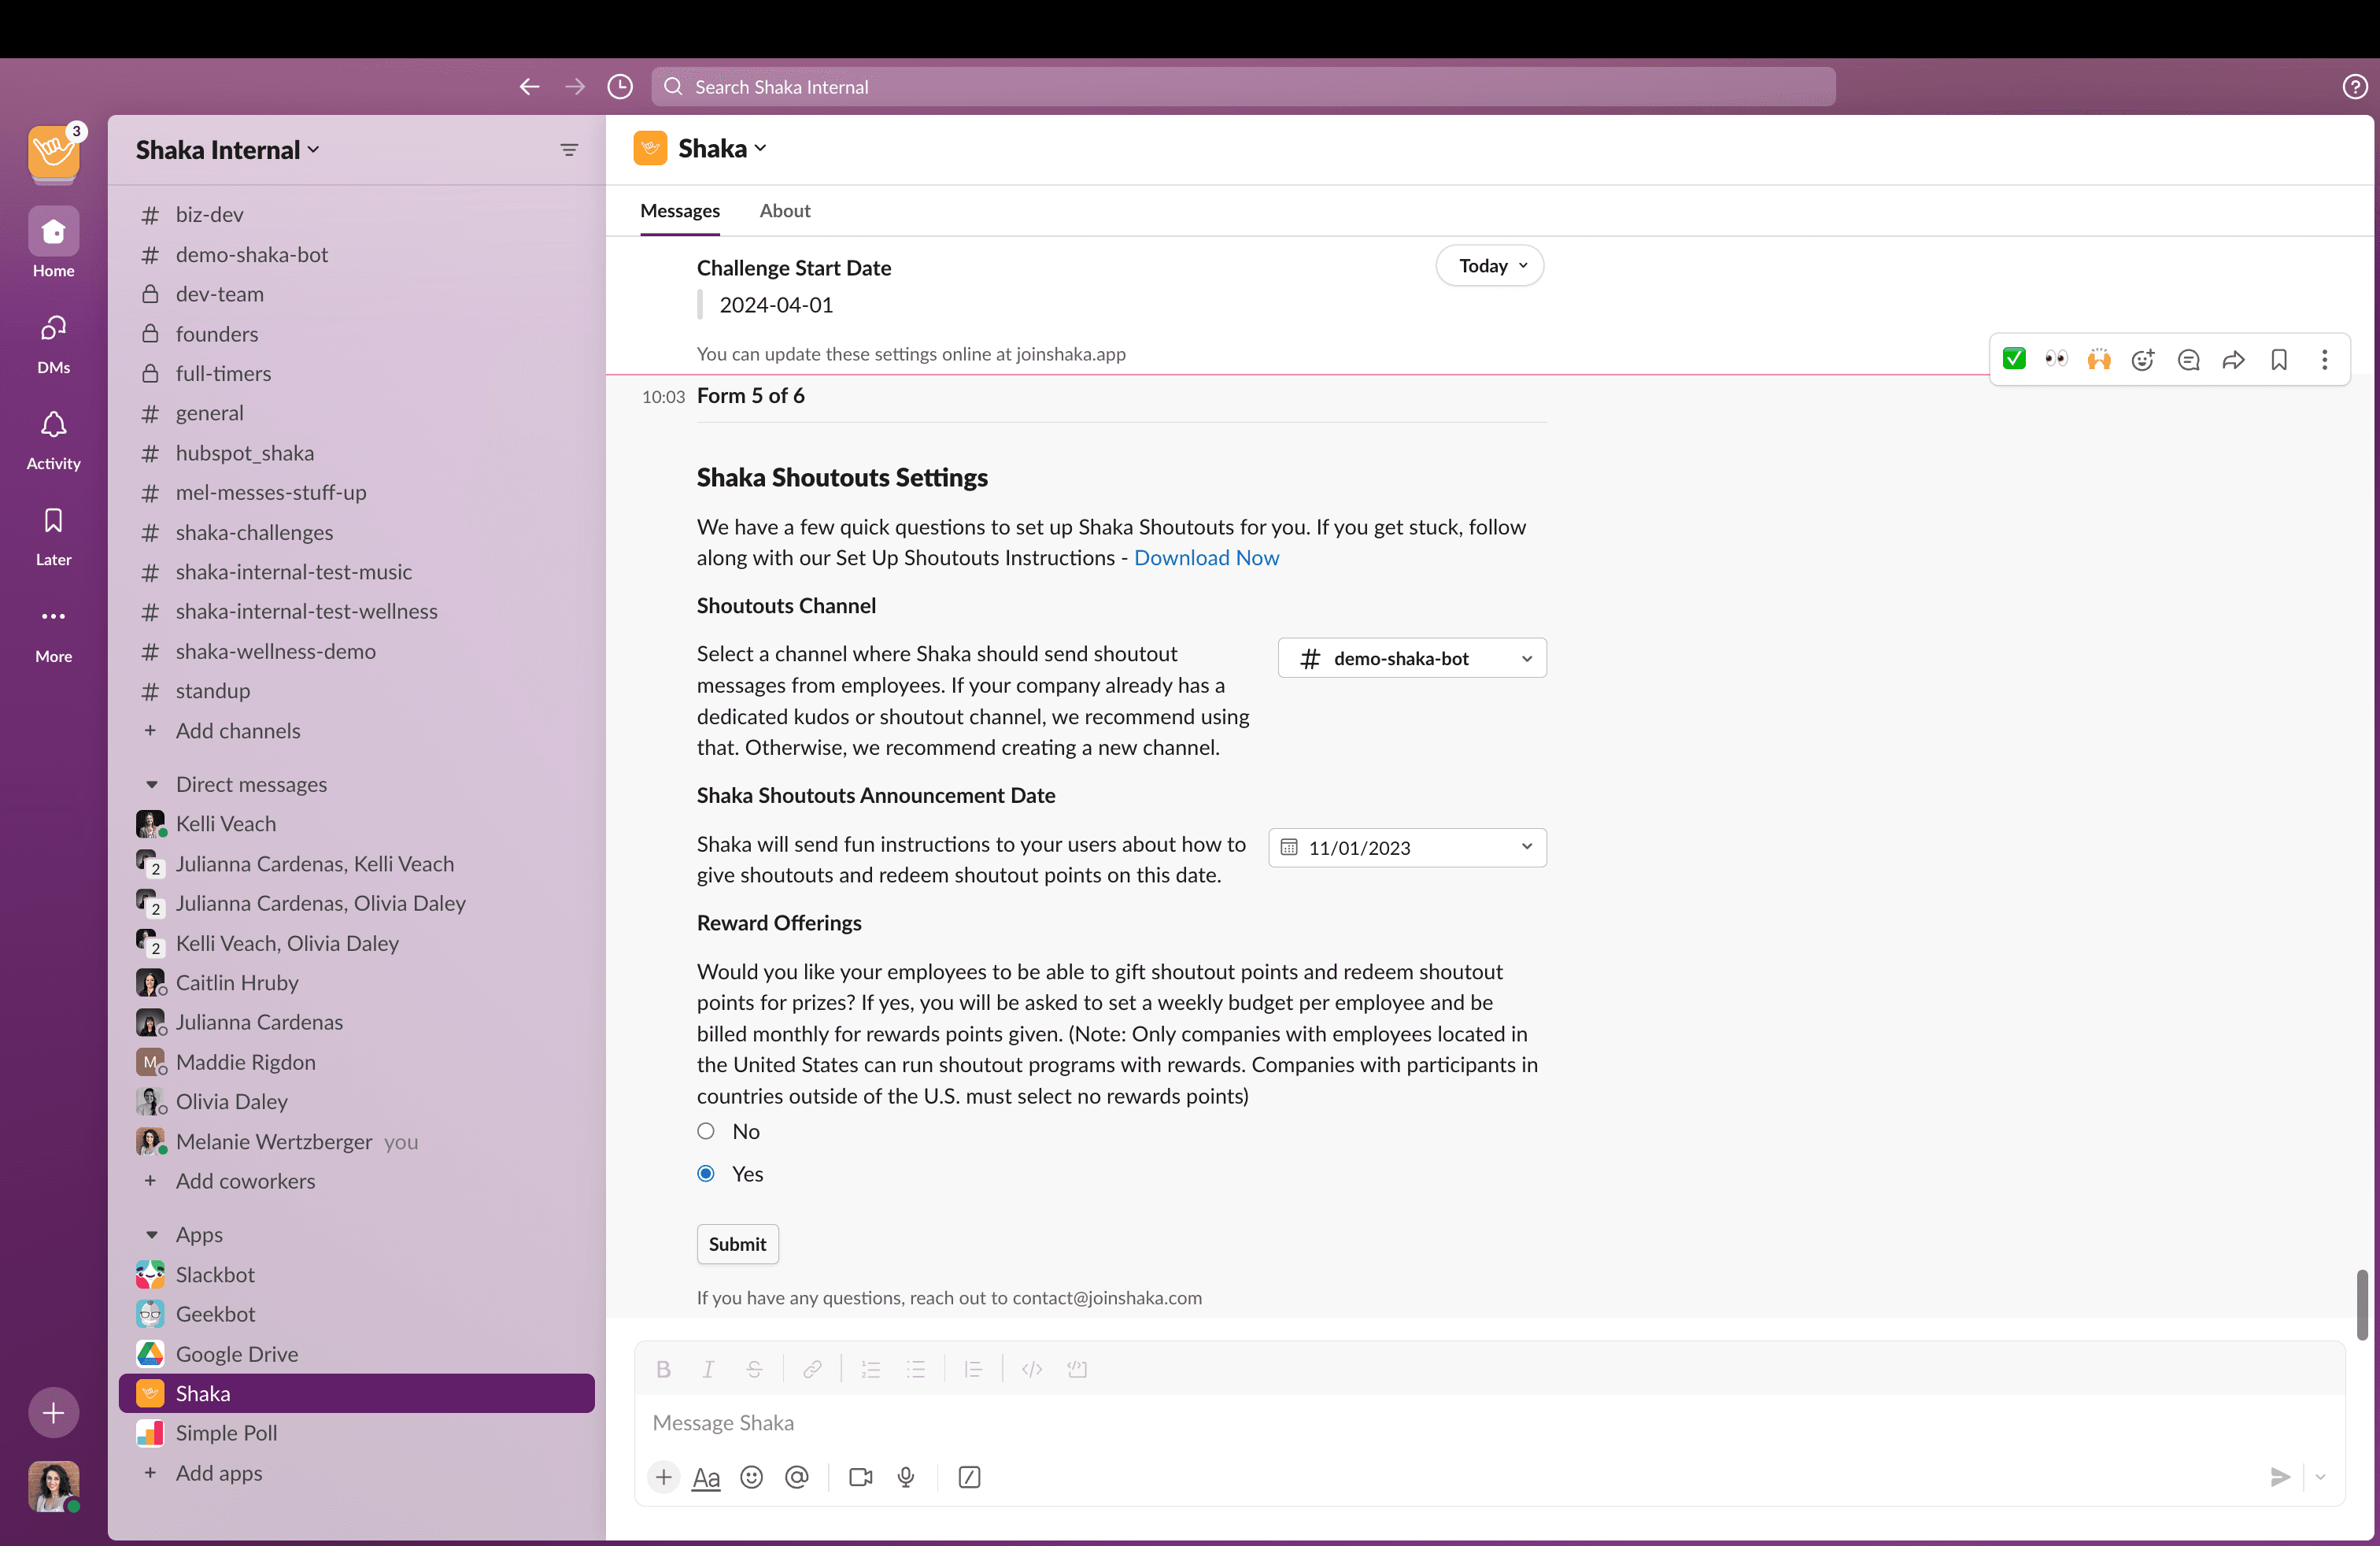
7. Complete the Shoutouts Settings Form
You will only see the Shoutouts Settings Form if you selected Shoutouts as one of your active features. If you did not select Shoutouts, please move to the end!
- Shoutouts Channel Every time someone recieves a shoutout, Shaka will share the shoutout in the channel of your choice. It is important that you select a channel where all of your users are involved so that Shaka Shoutouts feels like public recognition for great effort! This might be your primary channel or it might be a new channel called #shoutouts that you invite all of your users to join.
- Shoutouts Announcement Date You may not want to launch all of Shaka's tools all at once, so Shaka allows you to pick a launch date for each of our features. You can pick any date in the future. On this day, Shaka will announce your new Shoutouts program and tell employees how they can give one another shoutouts by using the /shoutout command
- Reward Offerings Now you need to decide if you would like to dedicate a budget to Shoutout Rewards or if you would like the program to be run with no rewards involved beyond the public recognition from peers. If you choose to offer rewards, users will be able to gift Shaka points along with their shoutout that the recipient can redeem for rewards via Shaka. PLEASE NOTE - SHAKA CAN ONLY SUPPORT REWARDS POINTS FOR USERS IN THE UNITED STATES. IF YOU HAVE PARTICIPANTS OUTSIDE OF THE U.S. YOU MUST SELECT 'NO REWARDS'
- Shoutout Points Budget If you decide you would like users to be able to gift and redeem Shaka points, you need to set a weekly budget per user for how many Shaka points they can gift. Each Shaka point has a value of $0.50 (50 cents). Thus, if you want each user to be able to gift $5 per week, you should set a points budget of 10 Shaka Points. Write "10" in the form. If a user does not gift all of their shoutout points for the week, their points reset, they do not accumulate. You are not charged for Shaka Points that are not sent.You will be billed monthly for any Shaka Points users have gifted.
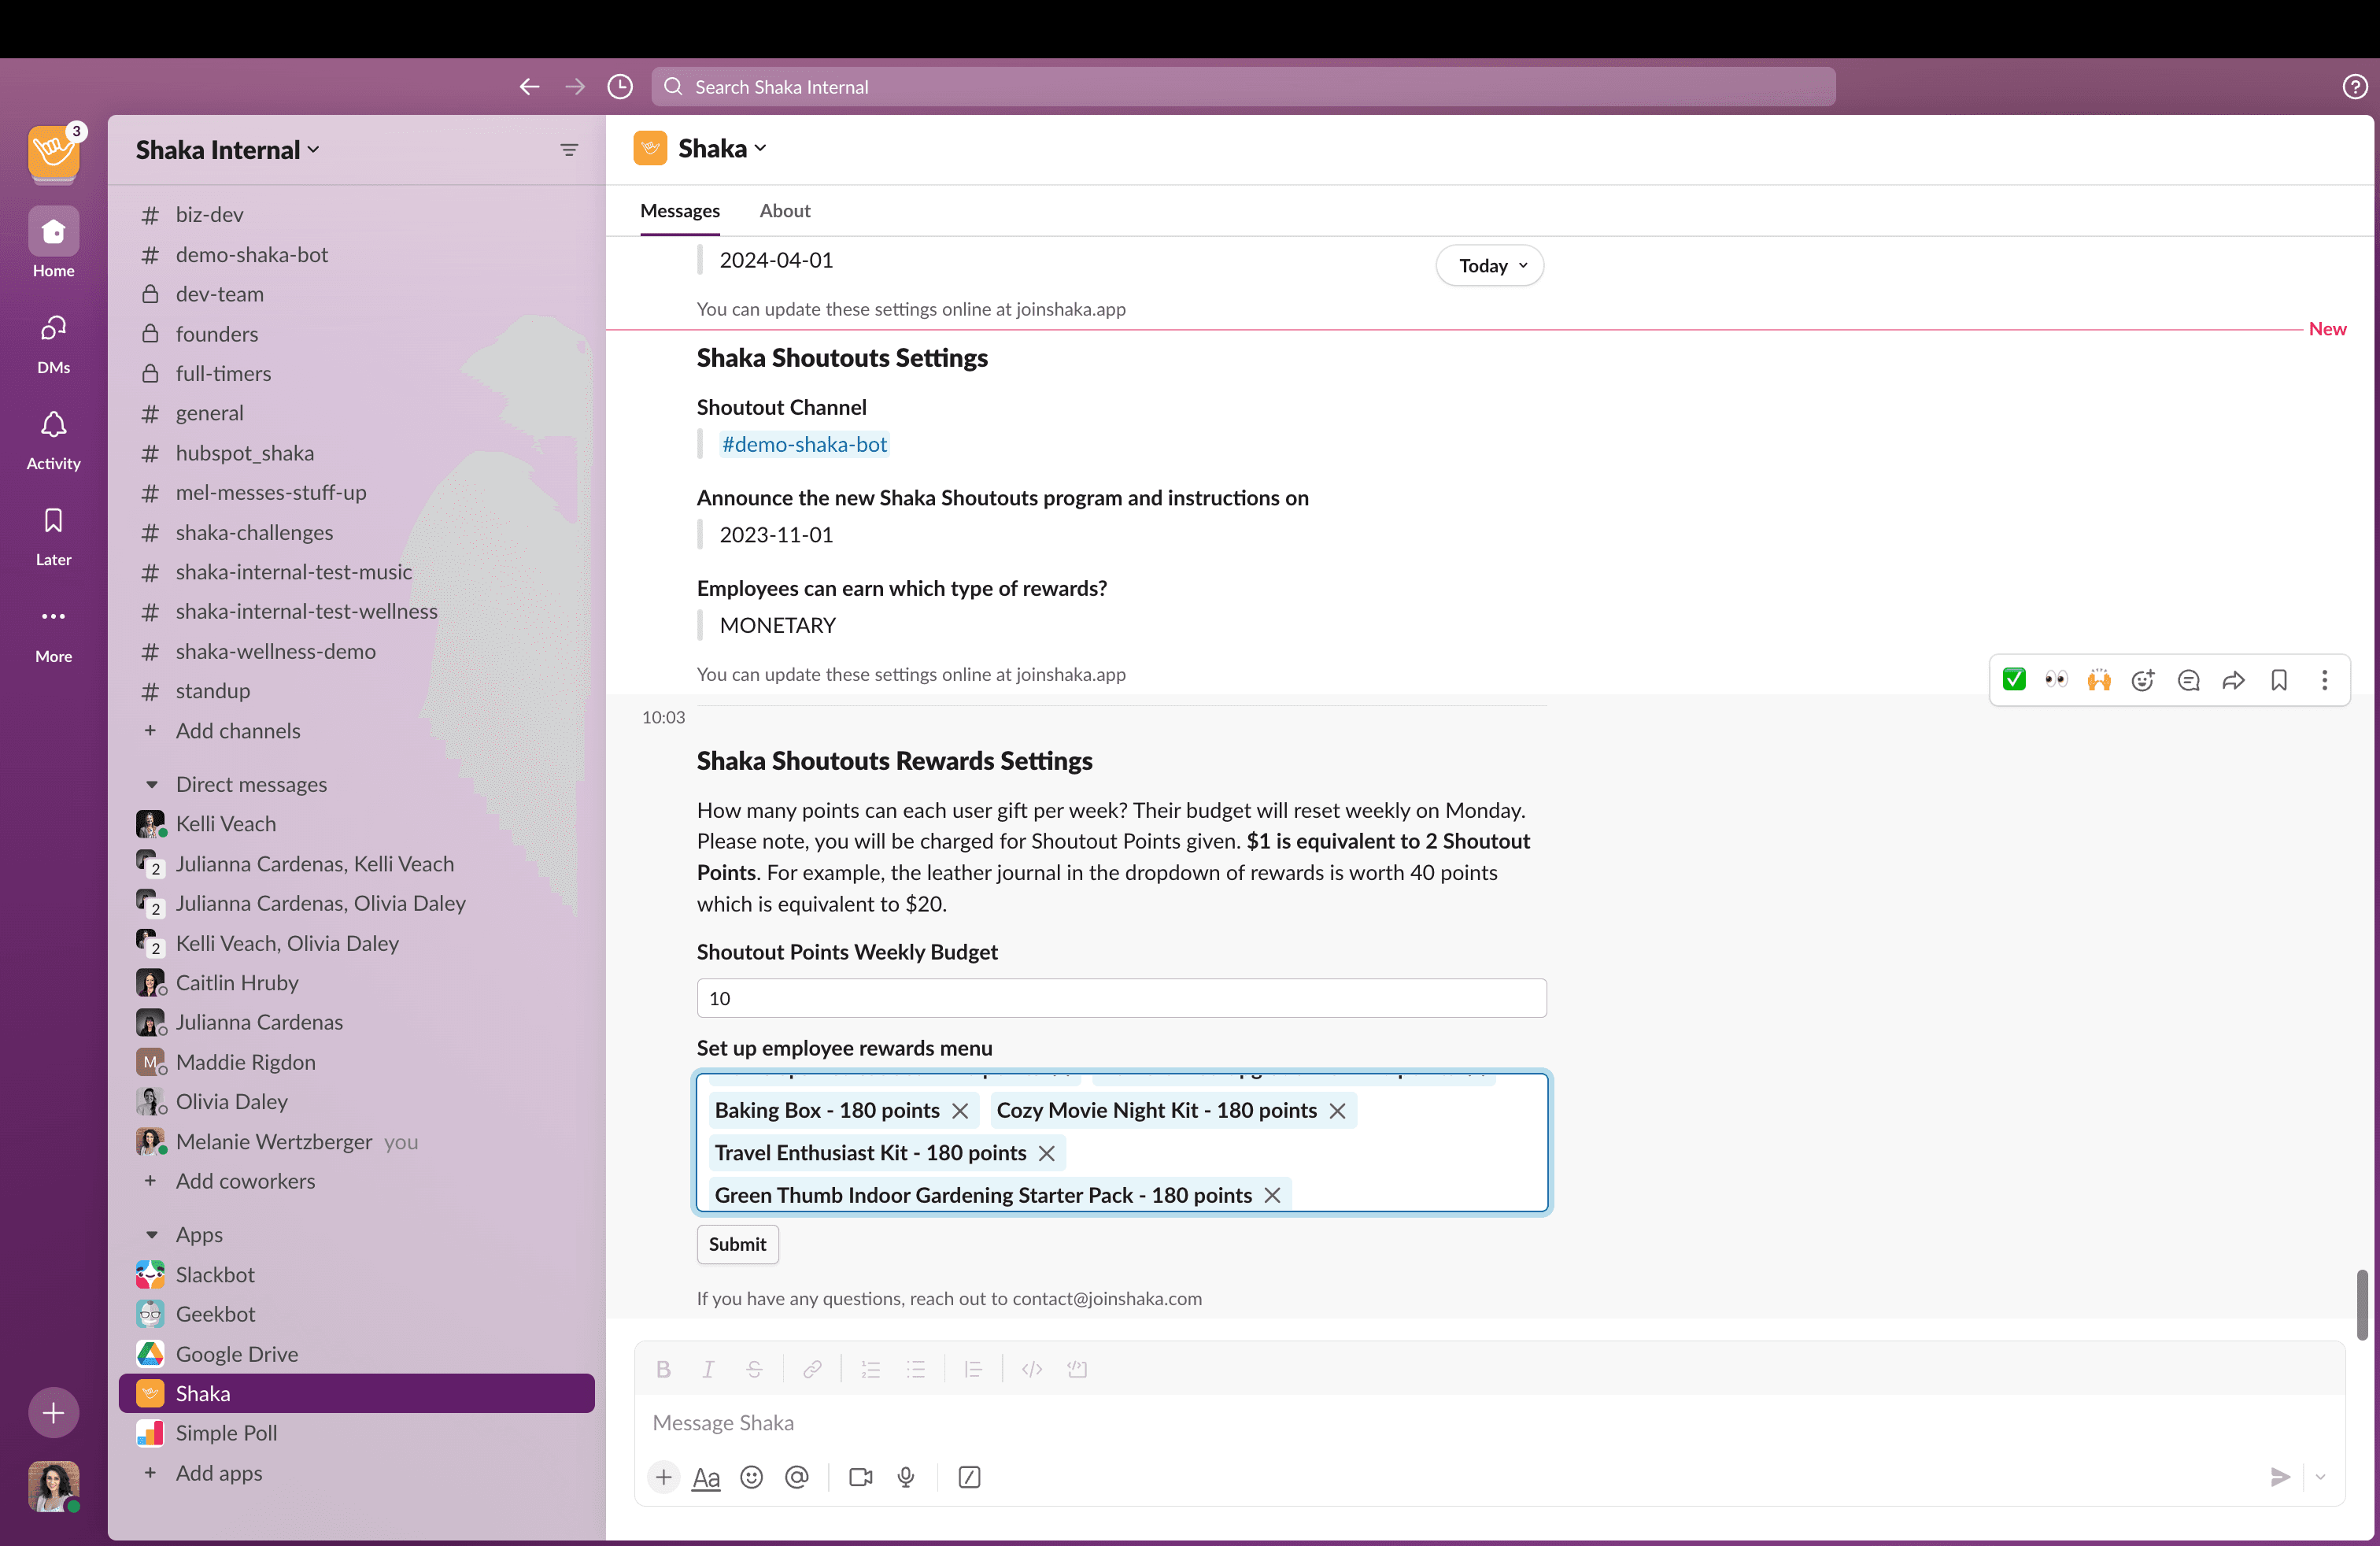
8. Set Your Shoutouts Budget and Rewards Menu
You will only see the Shoutouts Budgets & Rewards Form if you selected Shoutouts as one of your active features and selected "yes" to offering rewards on the prior form. If you did not select Shoutouts Rewards, please move to the end!
- Shoutout Points Budget If you decide you would like users to be able to gift and redeem Shaka points, you need to set a weekly budget per user for how many Shaka points they can gift. Each Shaka point has a value of $0.50 (50 cents). Thus, if you want each user to be able to gift $5 per week, you should set a points budget of 10 Shaka Points. Write "10" in the form. If a user does not gift all of their shoutout points for the week, their points reset, they do not accumulate. You are not charged for Shaka Points that are not sent.You will be billed monthly for any Shaka Points users have gifted.
- Shoutout Rewards Menu Shaka has so many fun rewards your users can redeem points for. Here we ask you to select all of the reward options you would like to offer to your employees. Please note, we highly recommend you offer ALL of the reward options unless your business directly competes or conflicts with one of the reward offerings. You are not responsible for managing and delivering rewards. Shaka handles reward redemption and distribution for you!
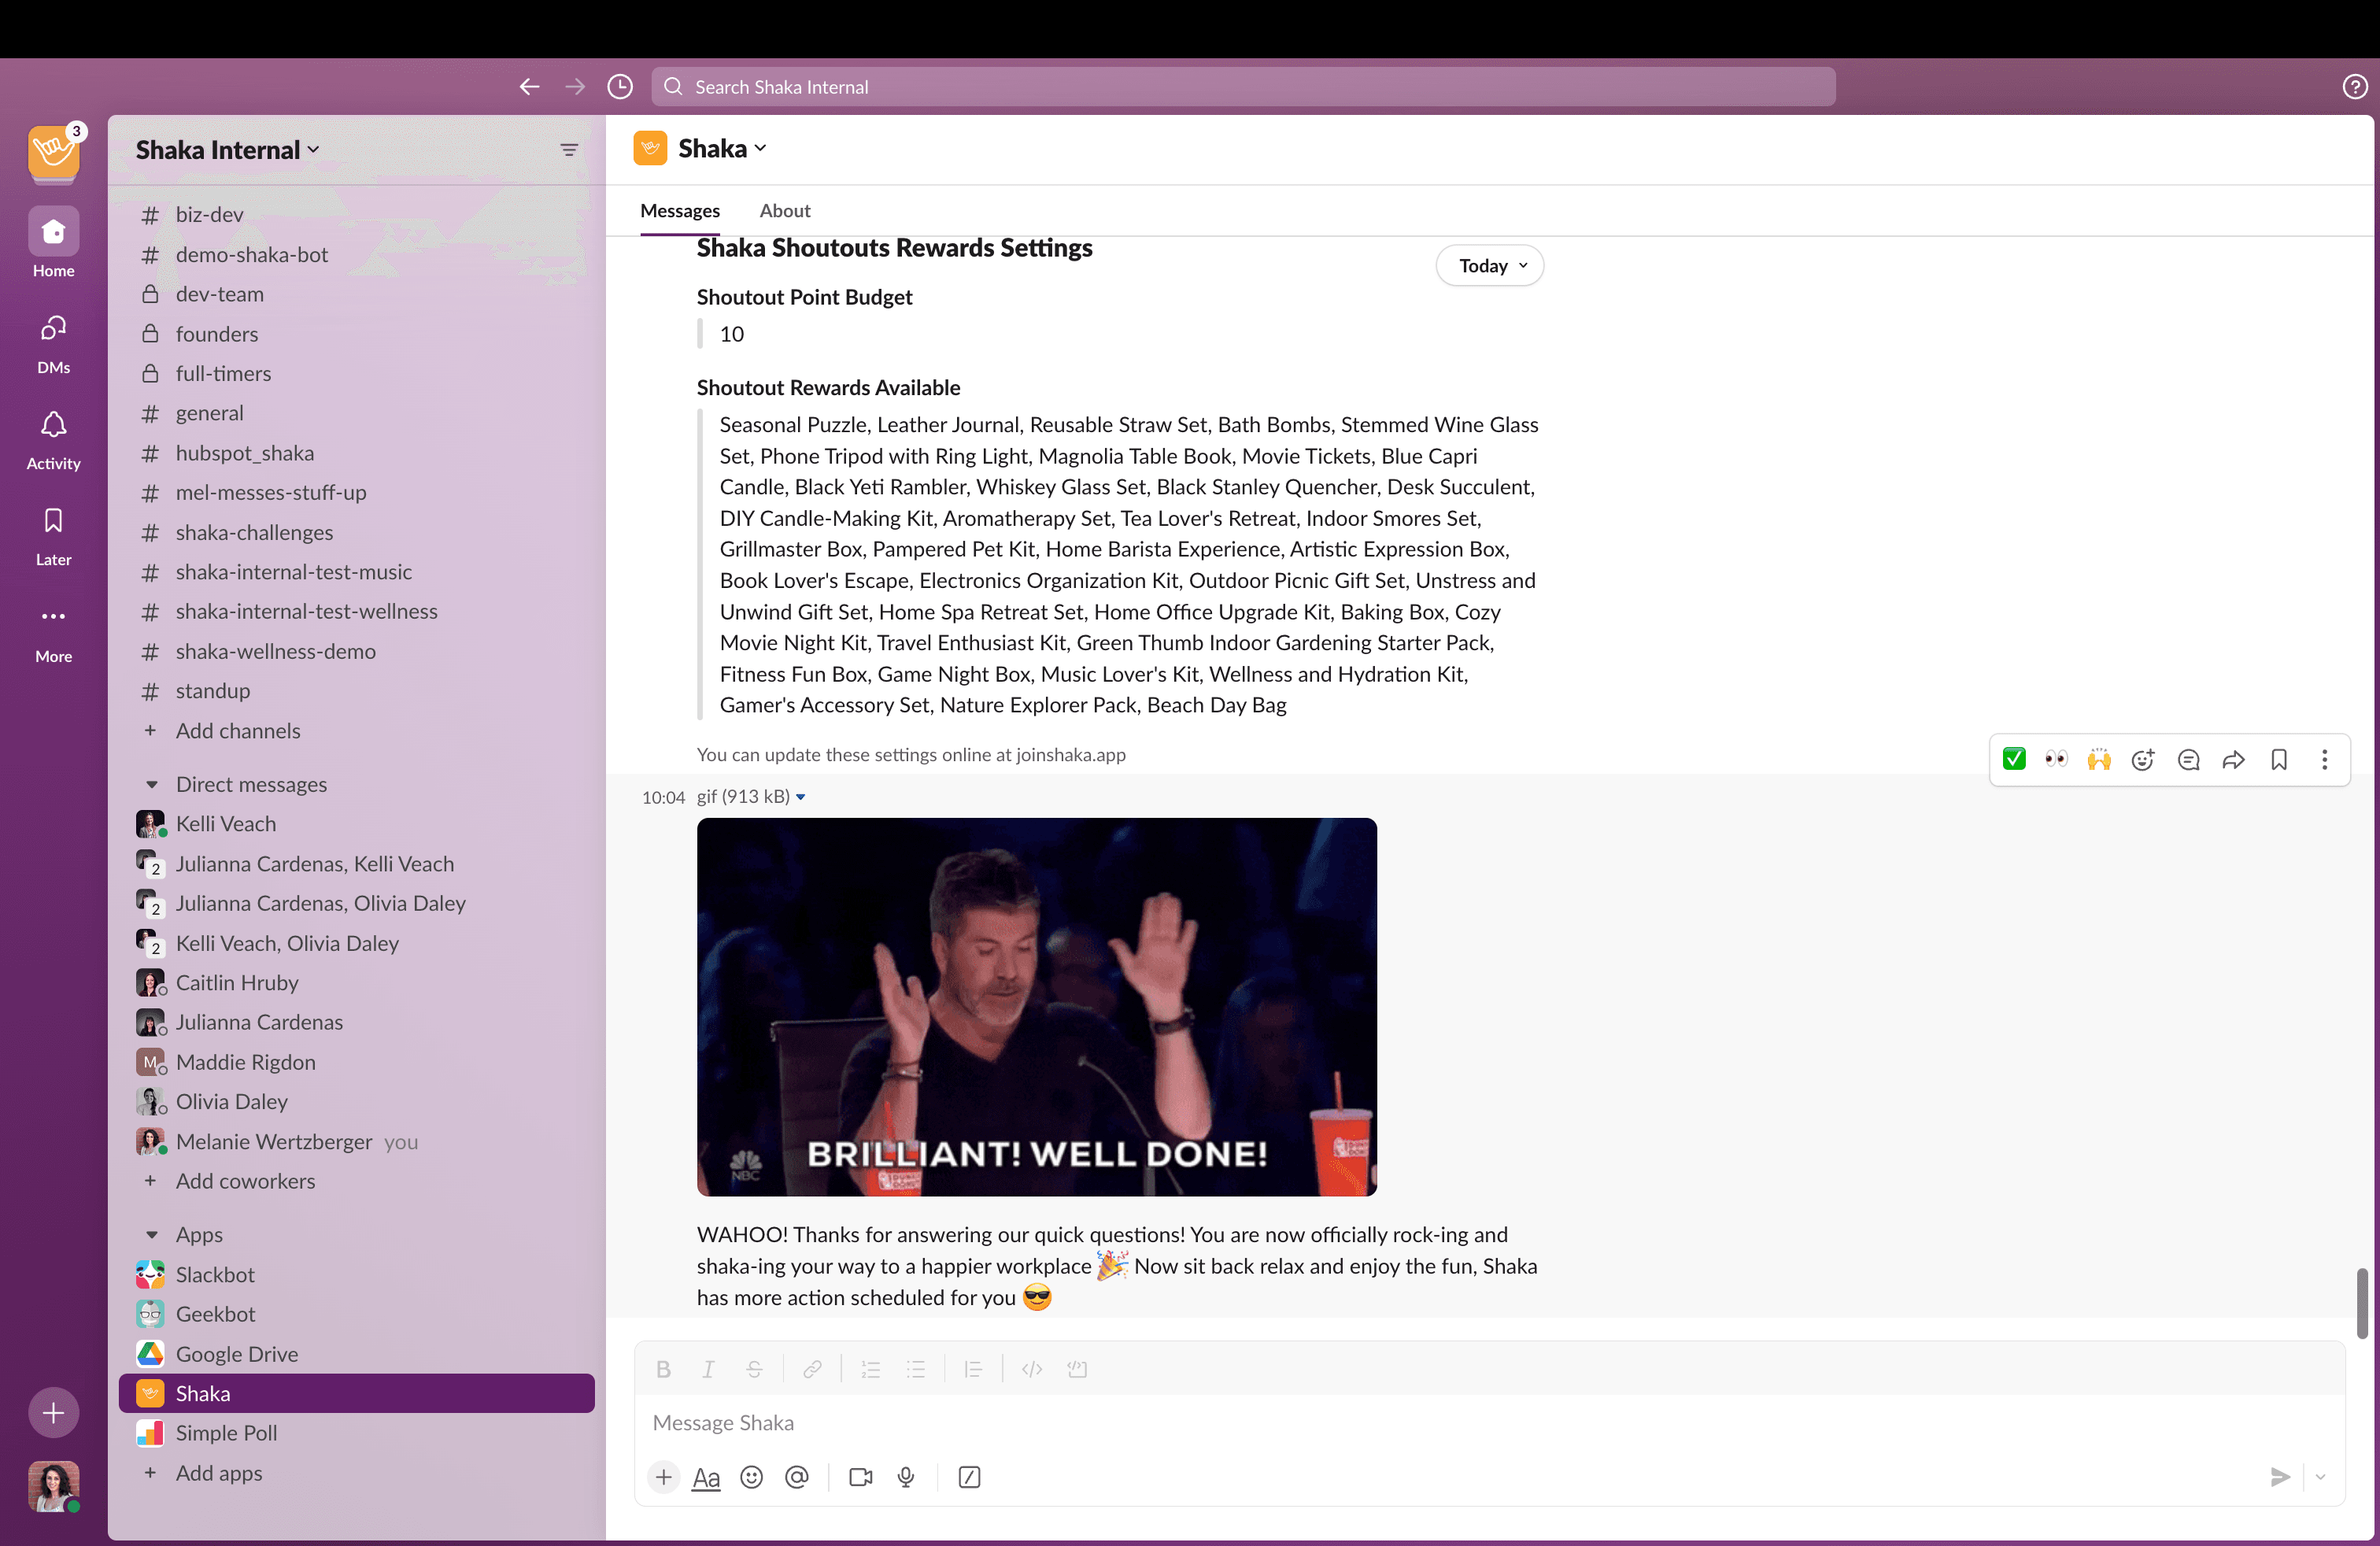
Wahoo! You have officially installed Shaka for your Slack workspace. Now sit back, relax and watch as your team reaches new levels of workplace camaraderie and happiness.
If you got stuck along the way or have any questions, don't hesitate to reach out to our team by emailing contact@joinshaka.com we will be happy to help!